What is the VNC protocol?
Virtual Network Computing (VNC) is a graphical desktop sharing system to remotely control another computer. It transmits the keyboard and mouse events from one computer to another, relaying the graphical screen updates back in the other direction, over a network.
What is TightVNC client?
TightVNC is a free remote control software. With TightVNC, you can see the desktop of a remote machine and control it with your local mouse and keyboard, just like you would do it sitting in the front of that computer.
Step 1: Make sure the computer you want to control is ready to listen TightVNC viewer.
Go check our tutorial/guide How To: Remotely control your PC or Mac from an iPhone (iPhone OS)
- Your Firewall should be open for port 5900. This is the port used for VNC protocol.
- If you want to control a PC be sure to install TightVNC (or you favorite VNC software)
- If you want to control a Mac be sure to enable "Screen Sharing". Go to System Preferences > Sharing.
Step 2: Download TightVNC and install it. Link
Step 3: After installed. Go to > Start > all programs > TightVNC
Step 4: Now you have the choice between "TightVNC viewer (Best Compression)" or "TightVNC viewer (Fast Compression). We tested both and saw no real difference between the two, except for cosmetics. "TightVNC viewer (Fast Compression) should be faster. It's up to you.
Step 5: add the IP adress of the computer you want to control Step 6: add the password you setup with TightVNC server for PC or "Screen Sharing" for Mac and press "ok"
Archives
-
▼
2008
(19)
- ► November 2008 (2)
-
▼
October 2008
(17)
- How To: remotely control a PC or Mac from a PC (Wi...
- How To: remotely control a PC or Mac from a Mac (M...
- How To: setup "Expose" with "Screen Corners" (Mac OS)
- How To: convert any video file to works with iTune...
- How To: copy and paste text (iPhone OS)
- FoxyTunes (Mac Os-Win OS)
- iPhone 2.2 software Rumors (iPhone OS)
- The Claye Feld Team goes mobile.
- How To: use your iPhone as WIFI modem anywhere (iP...
- The Future is Multi Touch!!!
- How To: password protected a folder (Mac Os)
- iStat menus (Mac OS)
- How To: add subtitles to AVI video files (Mac OS)
- How To: remotely control your PC or Mac from an iP...
- How To: take iPhone Screenshots (iPhone OS)
- How To: make free ringtones with Garageband (iPhon...
- PwnageTool and QuickPwn for 2.1 Firmware (iPhone Os)
What is the VNC protocol?
Virtual Network Computing (VNC) is a graphical desktop sharing system to remotely control another computer. It transmits the keyboard and mouse events from one computer to another, relaying the graphical screen updates back in the other direction, over a network.
What is Chicken of the VNC?
Chicken of the VNC is a VNC client for Mac OS. Using your Mac, you can connect to a Windows OS or a Mac OS and see the files, programs, and resources exactly as you would if you were sitting at your desk.
What you need:
Ckicken of the VNC. You can download it here: Link
Step 1: Make sure the computer you want to control is ready to listen Chicken of the VNC.
Go check our tutorial/guide How To: Remotely control your PC or Mac from an iPhone (iPhone OS)
- Your Firewall should be open for port 5900. This is the port used for VNC protocol.
- If you want to control a PC be sure to install TightVNC (or you favorite VNC software)
- If you want to control a Mac be sure to enable "Screen Sharing". Go to System Preferences > Sharing.
Step 2: install Chicken of the VNC
Step 3: add a new computer and its IP address in the list below
Step 4: add the password you setup with TightVNC or "Screen Sharing" and press "Connect"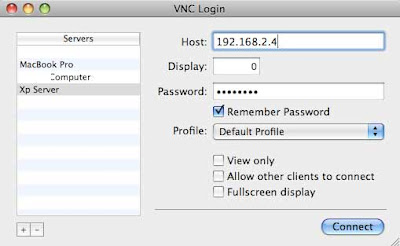
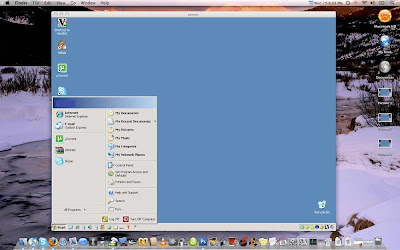
What is Expose?
Instantly access any open window when you drag you mouse to any corners of your screen. You can dispay all open windows, view windows of the current application or show the desktop or even the Dashboard.
Step 1: Go to "System Preferences" and click "Expose & Space". This is what you should see if you never setup "Expose" Step 2: Choose what you want to display in each corner (this is my setup for "Expose")
When I drag the mouse to the right-down corner of the screen I see the "Dashboard"
 What is iSquint?
iSquint is an iPod/iPhone video converter for Mac OS X. It works with almost all popular video formats, and it's free. It's also really easy.
Step 1: Download iSquint and install it: Download iSquint Step 2: Now drag the file you want to convert

Step 3: You can ask iSquint to add the file to iTunes when the conversion is done.
- Choose to Optimize for iPod or TV
- Choose H.264 encoding and the quality (leave the advanced setup by default)
- Press "Start" and you're done
- iSquint can convert most video files to iPod-screen-sized videos in realtime.
What is CopierciN?
CopierciN is an extended text editor with copy/paste functionality and import/export features among different applications (SMS, Contacts, Mail, Notes and Safari).
What you will need:
- A jailbroken iPhone (Want to know how? Just ask and we'll make a guide)
- Cydia installed
- CopierciN installed
Be aware that it is still beta. You'll see some bugs.
Step 1: Write something in the field then press at the end of the text until the magnifying glass appears. Then, drag your finger from the right to the left.
Step 2: Press "Copy" and press "Menu". Choose "export text as".

What is FoxyTunes?
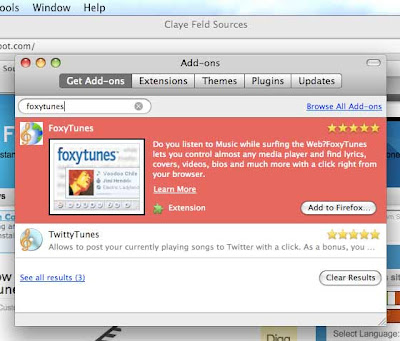
- Do you listen to Music while surfing the Web? FoxyTunes lets you control almost any media player and find lyrics, covers, videos, bios and much more with a click right from your browser.
- Tiny, unobtrusive and customizable
- Multiplatform - works on MS Windows, Linux and Mac OS X
- Position anywhere in the browser - on the status bar or on one of the toolbars
- Volume controls
- Configurable keyboard shortcuts
- Currently playing track information
- Customizable and collapsible
- Auto-hide

What you need:
- Firefox installed
Step 1: Install FoxyTunes. Go to "Tools" menu tab in Firefox and click on "add-ons"

Step 2: Click on "Get add-ons" and search for FoxyTunes. Install it and restart Firefox
- Apple works hard on the new realase of firmware 2.2. They are working on features that bring Street Views, public transit options, and location sharing and much more.
- Using the transit option, the 2.2 software guides the user to the nearest subway or bus stop with walking directions, then provides information on the subway/bus route (including route number).
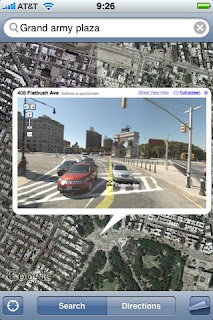
- The new street views feature allows users to view Google's street and do the fallowing thing:
| View street level photographs (select cities) | |
| Take virtual walks; pan, rotate and zoom | |
| Explore cityscapes, landmarks, points of interest | |
| Find shops, restaurants, parks, hotels and more | |
- The 2.2 software allows users to share location with others: when clicking "Share Location," users can send an email with a link to that exact location.
- Possibility to disable the iPhone's auto-correction in the next realase of Apple Firmware.

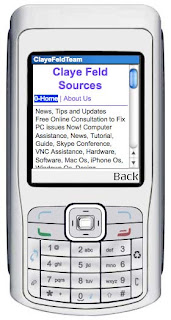
Right from your phone!!!
Go to: www.clayefeldteam.param.mobi
What is PdaNet?
PdaNet, made hugely popular with Windows Mobile and PalmOS, is now released for the iPhone. It allows your laptop (or desktop) to go online wirelessly by connecting it to your iPhone through wifi. PdaNet goes through the unlimited data plan on your phone and does not require any extra service. PdaNet turns your iPhone into a true WIFI router.
- First you will need a jailbroken iPhone to be able to install PdaNet.
- Go to Cydia. Search for PdaNet and install it.
- You will need to connect your iPhone and your mac (or PC) peer-to-peer (ad hoc), then launch PdaNet again.
How do I create an Peer-to-Peer (ad-hoc) network on my computer?
*In each of the following instructions WEP network key is optional but strongly recommended. Without it all computers/iPhones nearby could potentially connect to your computer AND your iPhone!
On Windows XP,
- Go to Control Panel->Network Connections, then right click on Wireless Network Connection and select Properties from the menu.
- Select Wireless Networks tab, under Preferred networks, click Add.
- Give a name to your network in the SSID box such as "iPhoneNet".
- Check "This is a computer-to-computer (ad-hoc) network and select "OK" to close the settings.
- Now on your iPhone go to Settings->WiFi and "iPhoneNet" should show up in the list unless your computer is already connected to a router. Tap on it and your computer should go online.
On Mac,
- Click on the Airport icon at the top of the screen.
- Select Create Network, give it a name such as "iPhoneNet".
- Now on your iPhone go to Settings->WiFi and "iPhoneNet" should show up in the list. Tap on it and your computer should go online.
"Multi-touch-sensing was designed to allow nontechies to do masterful things while allowing power users to be even more virtuosic." - Jefferson Y. Han
What is .DMG files (abbreviation for disk image)?
- These files are treated like a real disk commonly found on Mac OS X. They can be created with Disk Copy Utilities, burnt to CD or mounted as a normal volume. DMGs can be password-protected.
- What we want to do is create a .DMG file with a password then protect our files into the .DMG disk image
- This is the only way I found to protect files for free
Step 1: Create a DMG image disk. Go to > Application > Utilities > Disk Utility. Step 2: Click "New Image"
 Step 3: Choose the name of the DMG file you are going to create.
- Choose the size of the disk image.
- Choose the format (leave "Mac Os Extend" by default).
- Choose the encryption (128 bit it is your best choice, 256 is way too long).
- Choose Partitions (leave "Hard disk" by default).
- And finally choose the Image format (leave "read/write disk image" by default).
- Click "create".

Disk Utility will create the image.
it can take a while, specially if you
choose the create a big image
 Step 4: Disk utily will ask to create a password for the image. Enter it
- Here is the trick. Do NOT check the box who says "Remenber password in my keychain"
- Click "OK"
 Step 5: Now the image is created you double click on it. enter your password and drag the files you want to protect into it.
What is iStat menus?
iStat menus it is a free software who monitors your entire system right from your menubar, with 8 separate and highly configurable menu extras. You'll always know exactly what's going on inside your Mac!
You can download iStat menus here: www.islayer.com
CPU usage.
7 display modes, multiple core support. Monitor cpu usage for individual processes.
Memory usage.
4 display modes, page ins/outs and swap usage display. Monitor memory usage for individual processes.
Disks usage and activity.
6 display modes and the ability to hide disks you don't want to see.
Monitor networking.
Current and total bandwidth, peak bandwidth and IP addresses. PPP Controls for 10.5 users.
Temperatures.
Monitor the temperature of your Mac with 2 display modes and the ability to hide sensors you don't want to see.
Fans & Power.
Monitor the fan speeds, voltages, current and power usage, in your Mac. 2 display modes and the ability to hide sensors you don't want to see.
Bluetooth.
Control bluetooth status plus monitor the battery level of your Apple wireless keyboard or mouse.
Date & Time.
Date, time a calendar and a world clock in your menubar and unlimited world clocks in the dropdown.
What is .SRT and .SUB file extension?
Text file containing subtitles used by various video player programs; supported by AVI and DVD. You can view it with a text editor application. .SRT works with various player such as VLC Player, D-Subtitler, SubCleaner, Divx Player, MPlayer.
i.e. "movie.eng.srt" note that you will see the language of the subtitles.
- If you are watching videos with .AVI extension and want to add subtitles to it. You will need VLC player (our preference) installed on your Mac. - Here is the Internet subtitle database: Opensubtitles.org
- Download the subtitle you want. The file should have the .SRT or .SUB extension
- Keep the .SRT file together in the same folder as your .AVI file
- Rename the .SRT file exactly like the .AVI file. Like this:
- Double-click the movie file and VLC player will load both files.
What is the VNC protocol?
Virtual Network Computing (VNC) is a graphical desktop sharing system to remotely control another computer. It transmits the keyboard and mouse events from one computer to another, relaying the graphical screen updates back in the other direction, over a network.
What is Mocha VNC software?
Mocha VNCprovides access to a VNC server. Using your iPhone, you can connect to a Windows PC or a Mac OS X and see the files, programs, and resources exactly as you would if you were sitting at your desk, just on a smaller screen.
Download Mocha VNC: Here
LITE VERSION
Compared to the Lite version the full version has:- Another cool key board
- Support for right mouse button
- Text macro support
- Ctrl+alt+del key. Needed if using Win 200x as a VNC Server
FEATURES
- Standard VNC protocol with encrypted password signon- 8 and 32 bit color modes
- Local Mouse support
- Zoom and scroll as the Safari browser
- Landscape mode
- Can handle 20 different Host configurations
- Has been tested with RealVNC, TightVNC, UltrVNC on Windows, and Apple Remote Management, which is included with the Mac OS X.
Step 1: Make sure the computer you want to control is ready to listen Mocha VNC.
-If your using a PC, install TightVNC (free): Here
-If your using a Mac, just enable "screen sharing". Go to System Preferences > Sharing.
-Your Firewall should be open for port 5900. This is the port used for VNC protocol.
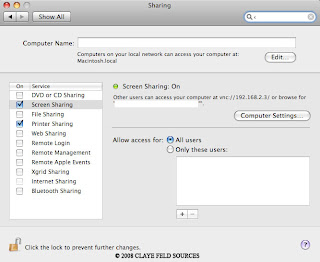

Step 2: Now that you computer is ready to listen. Install Mocha VNC from the App Store:
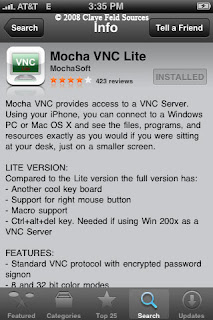
Step 3: After the install press "connect" and "edit"
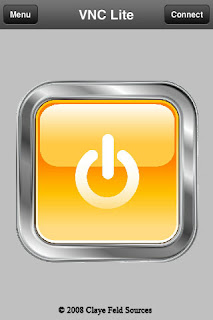
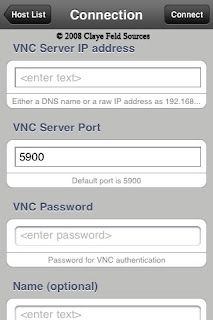
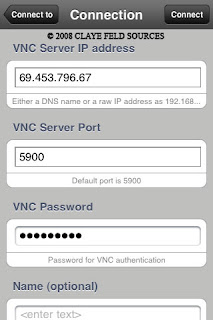
Step 4: You IP address Should be this one
Enter your password that you setup with "TightVNC" or "Screen Sharing"
With iTunes Version 7.4.1, Apple has added a custom ringtone maker for the iPhone, allowing users to select some tracks from iTunes and convert them into song that plays when a call is received or when the alarm sounds. "Some" is the key word -- not all songs on iTunes are elligible for the ringtone treatment.
In any event, if the song has a bell icon next to it in the iTunes Store, you can buy the song for $.99 and then convert it into a ringtone for another $.99 -- hence the $1.98 total ringtone price. It's a two-step process unless you previously bought the eligible song from iTunes. Wait there.....
Let's do it differently
What you will need:
-Mac OS
-GarageBand
-iTunes
Step 1: Create new project and create new real instrument track in Garageband


Step 2: Now drag you favorite MP3, WAV.... into Garageband on the track you just create.


Step 3: Go to > share and send ringtone to iTunes
Discussion
© 2008 Claye Feld Sources


